


One fun fact about solid colour viscose challis is that it's reversible. If there's a right or wrong side, I haven't found a way to tell yet. In that sense, it's perfect for the type of sewing patterns that requires a reversible fabric or where the "wrong" side of the fabric shows. For this project, I wanted to showcase this reversible feature of the fabric and the Ready to Sew Jane blouse came to mind.
If you follow French sewists on Instagram, you've probably come across this brilliant pattern in many chic versions. At first glance, it appears to be a button up shirt with a modern boxy silhouette. With a closer look you'll find a flattering drape which is achieved by a twist at the front hem. The whole front and back bodice of the shirt is actually drafted with just one pattern piece which folds onto itself and joins at the center back seam. Pure pattern magic and oh so satisfying to make!
It's one of those projects where the fabric and the pattern are made for each other and just meant to be. Once I started it I couldn't put it down! The viscose challis was easier to handle than some I've worked with in the past, not too shifty and slippery. Even the sometimes finicky collar and collar stand went in smoothly. As with most of my sewing projects, I used a light weight iron-on tricot Knit Interfacing (Pellon 135 for those of you in the USA), which has just the right balance of drape versus support for viscose challis.
I'm super impressed with the Ready to Sew Jane pattern. It comes in PDF format, which is in itself a piece of art. All sizes are colour coded and layered for printing. There are thoughtful hidden details throughout, such as a heart mark where pages are pieces together. There's even an interactive playlist link featuring inspirational music for your Jane. What a treat!
I wanted a semi-boxy fit so I went down one size from my measurement and it was the right decision. The subtle details of the slightly dropped shoulders and delicate collar and button band are just so chic. It only uses 3 buttons (Yes, only 3 button holes to sew, anyone?) and I used some precious mother of pearl ones from grandma's button jar.
I can confidently say my new Jane shirt is my favorite make to date. It is perfect in every way for me, from the rich teal colour, to the luxury feel of the fabric, to the fabulous drafting of the pattern. I love that I can wear it unbuttoned for a wrap effect with a camisole underneath, or buttoned up for a fun twist (literally) on the traditional button down shirt. It's the perfect day to night / work to leisure transformation.
So it comes down to this - I think I've just found my dream shirt/fabric combo and I now want one in every colour I can get my hands on, and just live in them...
Until next time,
Chloe @no.idle.hands
#minervamakes #minervamakers #isew #memade #memades #sewing #sewist #sewists #sewinginspo #sewinginspiration #sew #sewcialist #sewingproject #sewingprojects #sewingideas #sewingprojectideas #sewingpatterninspo #lovesewing #ilovesewing #sewsewsew #sewersgonnasew #makersgonnamake #sewaholic #sewaholics #shareyoursewing #sewinglove #handmadewardrobe #handemadeclothes #isewmyclothes #diyclothes #dressmaking #fabricinspo #seamstress #memadeeveryday #imakemyclothes #imakemyownclothes #fashion #fashioninspo #memadewardrobe #memadefashion #diyfashion #diywardrobe #fashionsewing #indiepatterns #indiesewingpatterns #readytosewpatterns #readytosew #janeblouse #readytosewjaneblouse #sewingblouses #sewingwithviscose #sewingwithchallis #sewingwithrayon #viscosesewingprojects #challissewingprojects #rayonsewingprojects


I was desperate to make a cosy cardigan for the winter but with a fashionable twist. I spotted this funky quilted Leather Fabric on the website and was inspired. Combined with a mint green Bouclé Fabric it really pops and gives some edginess to an otherwise homely garment.
Leather and quilting and fabric, oh my!
This was my first time ever sewing with leather and it wasn’t plain sailing. The pattern calls for the shoulder yokes to be folded under themselves then sewn onto the cardigan fronts. This meant topstitching through two layers of quilted leather and one of main garment fabric. I lined it all up and stepped on the pedal but then… nothing. No matter what I tried, I just could not get the layers to move, the leather seemed to stick to my presser foot. I tried 2 different teflon feet, a roller foot, and in the end had to use the brute force method! I started each row of topstitching halfway along the stitching line, leaving enough fabric behind the machine to literally pull it through by hand.
I love the look of leather but my inexperience of working with it shows here. If you have a sewing machine with adjustable foot pressure I’m guessing you’d be just fine but mine doesn’t so I think the foot was squeezing too hard on all the layers and sticking to the leather.
After a bit of sweating (and swearing!) the yokes were out of the way. The rest of the construction was more straightforward, although I did break two sewing machine needles and an overlocker needle in the process. I’d recommend you buy some thicker Sewing Needles for this one and take it slow; at one point I was sewing through 7 layers.
The pattern was easy to follow, except at 2 points. When sewing the collar there is no mention of basting it in place, instead the pattern states to sandwich it in between the facings and main garment then stitch straight off. For all the time it takes, I do think it’s worth basting the collar first because you can’t really see it sandwiched in there as you sew.
I also found the instructions confusing for the cuff construction - there is no mention of right or wrong sides, or the notches, and no fold line on the pattern pieces. I went ahead and completed the cuffs like I would on a bomber jacket or hoodie. The pattern suggested a lengthier technique seemingly in order to hide seam allowances (although you’d never see them anyway); at the time I was confused but re-reading now it seems to make more sense.
I honestly love the finished garment (maybe it’s the extra sweat that went into it)! The fit of the pattern is very modern and I can see myself making several versions of this. The fabrics look fantastic together and the bouclé sewed beautifully - I did much of the construction directly on the overlocker again. You can also see the Stretch Interfacing I used which has done a great job of maintaining the fabric’s softness in the facings and collar.
I’d be genuinely interested to hear any tips you have for sewing leather. What went wrong? Could my teflon feet be at fault? Some of the leather has split but this is really due to my heavy handling of it and inexperience with the material. (On the plus side I think it adds a certain weathered rustic charm to the look!) Leave me a comment here, on Twitter or Instagram if you have any tips for sewing leather.
Next month, I take on the fashionista’s eternal problem: a wardrobe full of clothes yet nothing to wear! It’s a sort of 'fast-fashion' project… and there may even be a little glitter involved. Well, it is nearly Christmas after all.
Until next time, happy sewing!
Duncan
xx
#minervamakes #minervamakers #isew #memade #memades #sewing #sewist #sewists #sewinginspo #sewinginspiration #sew #sewcialist #sewingproject #sewingprojects #sewingideas #sewingprojectideas #sewingpatterninspo #lovesewing #ilovesewing #sewsewsew #sewersgonnasew #makersgonnamake #sewaholic #sewaholics #shareyoursewing #sewinglove #handmadewardrobe #handemadeclothes #isewmyclothes #memadefashion #diyclothes #diyfashion #diywardrobe #dressmaking #fabricinspo #fashionsewing #seamstress #memadeeveryday #imakemyclothes #imakemyownclothes #fashion #fashioninspo #memadewardrobe #sewingjackets #sewingblazers #sewingformen #sewingmenswear #menwhosew #sewingcardigans #newcastlecardigan #threadtheorynewcastlecardigan #threadtheory #threadtheorypatterns #indiepatterns #indiesewingpatterns


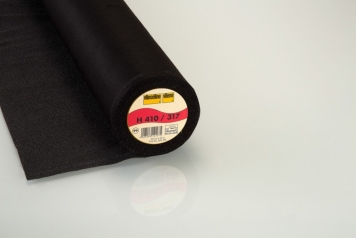
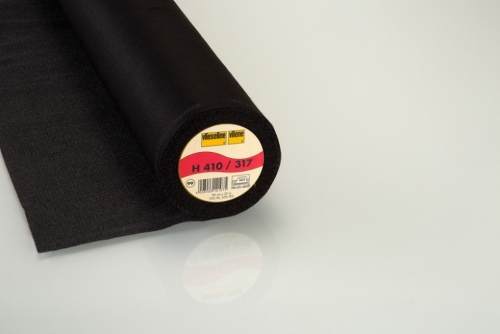
This soft versatile interfacing can be used on whole jacket fronts and small parts such as collars and pocket flaps. It has good shape-retaining qualities and is available in colours black and white. It is 90cm wide and available by the metre or by the roll.
This interfacing is suitable for light to medium weight fabrics such as wool, poplin, flannel, gabardine, satin and silk.
To apply, use the damp cloth method with an iron setting of wool/cotton. Press each area for 10-12 seconds.
Vilene H410 (tagged below)
This Iron On Light Easy Fuse Ultrasoft Interfacing is a soft interfacing with stabilising vertical threads, designed to give a traditional tailored effect. Suitable for whole jacket fronts, plus smaller parts such as collars, lapels, pocket flaps and slits. Retains perfect shape and is comfortable to wear. Available in colours black and white. It is 90cm wide and available by the metre or by the roll.
This interfacing is suitable for many fabrics from light to heavy weight, such as wool, gabardine, tweed, worsted, silk, satin or double jersey.
It is important to know with this interfacing when cutting out, the threads along the grain must follow the grain of the fabric. Use the damp cloth method, with your iron on a wool/cotton setting. Press each area for 10-12 seconds. Washable at 40 degrees and dry cleanable.
Here's a step by step guide on how it works (shown on a blazer front piece);
1) Cut out the blazer front part and the interlining. Lay the adhesive side of the interlining on the wrong side of the blazer front part.
2) Using a damp cloth, iron the interlining onto the front part step by step.
3) Attach the fused front part to the blazer.
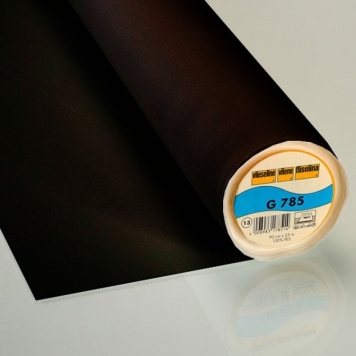
Vilene G785 (tagged below)
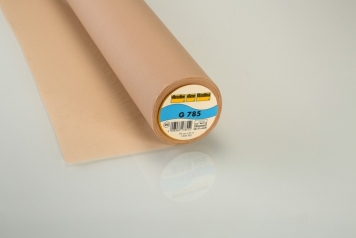
This iron on interfacing is a soft, lightweight and bi-elastic woven interlining for small parts of blouses and dresses as well as for front parts of jackets, coats etc. made of lightweight and/or elastic outer fabrics. It is available in colours black, white and skin. It is 90cm wide and available by the metre or by the roll.
It is suitable for delicate, flowing fabrics such as silk, viscose, acetate and cupro. It is also suitable for stretch and sheer (transparent) fabrics.
Here's a step by step guide on how it works;
1) Like all interfacing made by Vilene, the interfacing is always cut in a lengthwise direction, and thereby follows the grain of the fabric.
2) Using a low heat – iron setting at wool/silk – first apply quickly to prevent any warping, then slowly glide the iron or cover the entire area with a damp cloth.
3) Allow the pieces to cool flat for about 30 minutes, so that the adhesive can set properly.
Continued in our next post…


metre
41.6 in stock
Sort By:


Free delivery when you spend €120.00
Soft, lightweight and bi elastic woven interlining for small parts of blouses and dresses as well as for front parts of jackets, coats etc. made of lightweight and or elastic outer fabrics. Ideal for delicate, flowing fabrics such as silk, viscose, acetate and cupro; also suitable for elastic stretch and transparent fabrics. Two way stretch. Excellent hold on difficult fabrics such as e.g. viscose, acetate and cupro, even coated fabrics. Comfortable to wear. Strong but flexible feel. To use, like all interfacing made by Vilene, the interfacing is always cut in a lengthwise direction, and thereby follows the grain of the fabric. Using a low heat, iron setting at wool silk first apply quickly to prevent any warping, then slowly glide the iron or cover the entire area with a damp cloth. Allow the pieces to cool flat for about 30 minutes, so that the adhesive can set properly. We strongly recommend that you attach a small piece of interfacing to a fabric remnant with your iron first to make sure that the hold and the adhesion meet your expectations.
MCID
SKU
2VG785-05
Craft
Dressmaking
Type
Interfacing
Brand
Vilene Vlieseline
Colour
Beige
Stretch
Stretch
Stretch % Width
10%
Stretch % Length
0%
Width
90cm / 35.4 inches
Weight
Light
Quantity
per metre
- Suggested Washing Instructions: 30 degrees
- This product can be pre-ordered if it has run out of stock
- All sizes and measurements on this item are approximate
- This item is sold per metre. The minimum amount you can order is half a metre (0.5) and thereafter you can order in 10cm increments i.e. 1.1mt, 1.2mt, 1.3mt etc
€9.99
(Free when you spend €120.00)
Average Dispatch Time: 1 working day
Estimated 5-7 working days delivery time
Item Details
Soft, lightweight and bi elastic woven interlining for small parts of blouses and dresses as well as for front parts of jackets, coats etc. made of lightweight and or elastic outer fabrics. Ideal for delicate, flowing fabrics such as silk, viscose, acetate and cupro; also suitable for elastic stretch and transparent fabrics. Two way stretch. Excellent hold on difficult fabrics such as e.g. viscose, acetate and cupro, even coated fabrics. Comfortable to wear. Strong but flexible feel. To use, like all interfacing made by Vilene, the interfacing is always cut in a lengthwise direction, and thereby follows the grain of the fabric. Using a low heat, iron setting at wool silk first apply quickly to prevent any warping, then slowly glide the iron or cover the entire area with a damp cloth. Allow the pieces to cool flat for about 30 minutes, so that the adhesive can set properly. We strongly recommend that you attach a small piece of interfacing to a fabric remnant with your iron first to make sure that the hold and the adhesion meet your expectations.
MCID
SKU
2VG785-05
Craft
Dressmaking
Type
Interfacing
Brand
Vilene Vlieseline
Colour
Beige
Stretch
Stretch
Stretch % Width
10%
Stretch % Length
0%
Width
90cm / 35.4 inches
Weight
Light
Quantity
per metre
Info
- Suggested Washing Instructions: 30 degrees
- This product can be pre-ordered if it has run out of stock
- All sizes and measurements on this item are approximate
- This item is sold per metre. The minimum amount you can order is half a metre (0.5) and thereafter you can order in 10cm increments i.e. 1.1mt, 1.2mt, 1.3mt etc
Delivery & Returns
€9.99
(Free when you spend €120.00)
Average Dispatch Time: 1 working day
Estimated 5-7 working days delivery time
41.6 in stock
Sort By:
Free delivery when you spend €120.00
Soft, lightweight and bi elastic woven interlining for small parts of blouses and dresses as well as for front parts of jackets, coats etc. made of lightweight and or elastic outer fabrics. Ideal for delicate, flowing fabrics such as silk, viscose, acetate and cupro; also suitable for elastic stretch and transparent fabrics. Two way stretch. Excellent hold on difficult fabrics such as e.g. viscose, acetate and cupro, even coated fabrics. Comfortable to wear. Strong but flexible feel. To use, like all interfacing made by Vilene, the interfacing is always cut in a lengthwise direction, and thereby follows the grain of the fabric. Using a low heat, iron setting at wool silk first apply quickly to prevent any warping, then slowly glide the iron or cover the entire area with a damp cloth. Allow the pieces to cool flat for about 30 minutes, so that the adhesive can set properly. We strongly recommend that you attach a small piece of interfacing to a fabric remnant with your iron first to make sure that the hold and the adhesion meet your expectations.
MCID
SKU
2VG785-05
Craft
Dressmaking
Type
Interfacing
Brand
Vilene Vlieseline
Colour
Beige
Stretch
Stretch
Stretch % Width
10%
Stretch % Length
0%
Width
90cm / 35.4 inches
Weight
Light
Quantity
per metre
- Suggested Washing Instructions: 30 degrees
- This product can be pre-ordered if it has run out of stock
- All sizes and measurements on this item are approximate
- This item is sold per metre. The minimum amount you can order is half a metre (0.5) and thereafter you can order in 10cm increments i.e. 1.1mt, 1.2mt, 1.3mt etc
€9.99
(Free when you spend €120.00)
Average Dispatch Time: 1 working day
Estimated 5-7 working days delivery time
Item Details
Soft, lightweight and bi elastic woven interlining for small parts of blouses and dresses as well as for front parts of jackets, coats etc. made of lightweight and or elastic outer fabrics. Ideal for delicate, flowing fabrics such as silk, viscose, acetate and cupro; also suitable for elastic stretch and transparent fabrics. Two way stretch. Excellent hold on difficult fabrics such as e.g. viscose, acetate and cupro, even coated fabrics. Comfortable to wear. Strong but flexible feel. To use, like all interfacing made by Vilene, the interfacing is always cut in a lengthwise direction, and thereby follows the grain of the fabric. Using a low heat, iron setting at wool silk first apply quickly to prevent any warping, then slowly glide the iron or cover the entire area with a damp cloth. Allow the pieces to cool flat for about 30 minutes, so that the adhesive can set properly. We strongly recommend that you attach a small piece of interfacing to a fabric remnant with your iron first to make sure that the hold and the adhesion meet your expectations.
MCID
SKU
2VG785-05
Craft
Dressmaking
Type
Interfacing
Brand
Vilene Vlieseline
Colour
Beige
Stretch
Stretch
Stretch % Width
10%
Stretch % Length
0%
Width
90cm / 35.4 inches
Weight
Light
Quantity
per metre
Info
- Suggested Washing Instructions: 30 degrees
- This product can be pre-ordered if it has run out of stock
- All sizes and measurements on this item are approximate
- This item is sold per metre. The minimum amount you can order is half a metre (0.5) and thereafter you can order in 10cm increments i.e. 1.1mt, 1.2mt, 1.3mt etc
Delivery & Returns
€9.99
(Free when you spend €120.00)
Average Dispatch Time: 1 working day
Estimated 5-7 working days delivery time
One fun fact about solid colour viscose challis is that it's reversible. If there's a right or wrong side, I haven't found a way to tell yet. In that sense, it's perfect for the type of sewing patterns that requires a reversible fabric or where the "wrong" side of the fabric shows. For this project, I wanted to showcase this reversible feature of the fabric and the Ready to Sew Jane blouse came to mind.
If you follow French sewists on Instagram, you've probably come across this brilliant pattern in many chic versions. At first glance, it appears to be a button up shirt with a modern boxy silhouette. With a closer look you'll find a flattering drape which is achieved by a twist at the front hem. The whole front and back bodice of the shirt is actually drafted with just one pattern piece which folds onto itself and joins at the center back seam. Pure pattern magic and oh so satisfying to make!
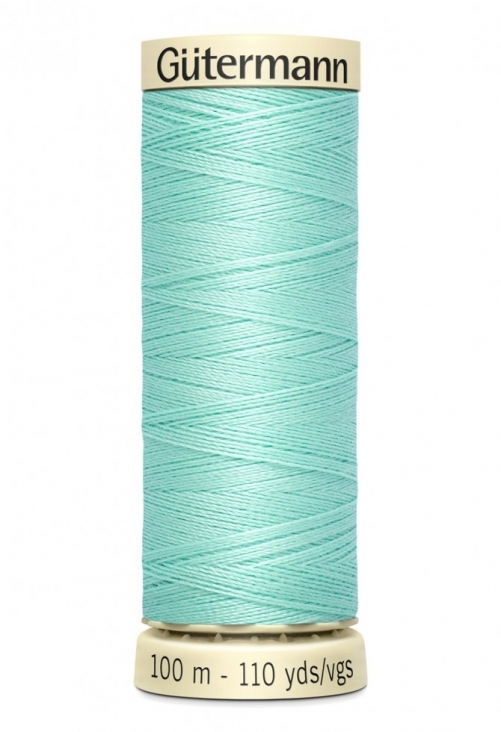
It's one of those projects where the fabric and the pattern are made for each other and just meant to be. Once I started it I couldn't put it down! The viscose challis was easier to handle than some I've worked with in the past, not too shifty and slippery. Even the sometimes finicky collar and collar stand went in smoothly. As with most of my sewing projects, I used a light weight iron-on tricot Knit Interfacing (Pellon 135 for those of you in the USA), which has just the right balance of drape versus support for viscose challis.
I'm super impressed with the Ready to Sew Jane pattern. It comes in PDF format, which is in itself a piece of art. All sizes are colour coded and layered for printing. There are thoughtful hidden details throughout, such as a heart mark where pages are pieces together. There's even an interactive playlist link featuring inspirational music for your Jane. What a treat!
I wanted a semi-boxy fit so I went down one size from my measurement and it was the right decision. The subtle details of the slightly dropped shoulders and delicate collar and button band are just so chic. It only uses 3 buttons (Yes, only 3 button holes to sew, anyone?) and I used some precious mother of pearl ones from grandma's button jar.
I can confidently say my new Jane shirt is my favorite make to date. It is perfect in every way for me, from the rich teal colour, to the luxury feel of the fabric, to the fabulous drafting of the pattern. I love that I can wear it unbuttoned for a wrap effect with a camisole underneath, or buttoned up for a fun twist (literally) on the traditional button down shirt. It's the perfect day to night / work to leisure transformation.
So it comes down to this - I think I've just found my dream shirt/fabric combo and I now want one in every colour I can get my hands on, and just live in them...
Until next time,
Chloe @no.idle.hands
#minervamakes #minervamakers #isew #memade #memades #sewing #sewist #sewists #sewinginspo #sewinginspiration #sew #sewcialist #sewingproject #sewingprojects #sewingideas #sewingprojectideas #sewingpatterninspo #lovesewing #ilovesewing #sewsewsew #sewersgonnasew #makersgonnamake #sewaholic #sewaholics #shareyoursewing #sewinglove #handmadewardrobe #handemadeclothes #isewmyclothes #diyclothes #dressmaking #fabricinspo #seamstress #memadeeveryday #imakemyclothes #imakemyownclothes #fashion #fashioninspo #memadewardrobe #memadefashion #diyfashion #diywardrobe #fashionsewing #indiepatterns #indiesewingpatterns #readytosewpatterns #readytosew #janeblouse #readytosewjaneblouse #sewingblouses #sewingwithviscose #sewingwithchallis #sewingwithrayon #viscosesewingprojects #challissewingprojects #rayonsewingprojects
I was desperate to make a cosy cardigan for the winter but with a fashionable twist. I spotted this funky quilted Leather Fabric on the website and was inspired. Combined with a mint green Bouclé Fabric it really pops and gives some edginess to an otherwise homely garment.
Leather and quilting and fabric, oh my!
This was my first time ever sewing with leather and it wasn’t plain sailing. The pattern calls for the shoulder yokes to be folded under themselves then sewn onto the cardigan fronts. This meant topstitching through two layers of quilted leather and one of main garment fabric. I lined it all up and stepped on the pedal but then… nothing. No matter what I tried, I just could not get the layers to move, the leather seemed to stick to my presser foot. I tried 2 different teflon feet, a roller foot, and in the end had to use the brute force method! I started each row of topstitching halfway along the stitching line, leaving enough fabric behind the machine to literally pull it through by hand.
I love the look of leather but my inexperience of working with it shows here. If you have a sewing machine with adjustable foot pressure I’m guessing you’d be just fine but mine doesn’t so I think the foot was squeezing too hard on all the layers and sticking to the leather.
After a bit of sweating (and swearing!) the yokes were out of the way. The rest of the construction was more straightforward, although I did break two sewing machine needles and an overlocker needle in the process. I’d recommend you buy some thicker Sewing Needles for this one and take it slow; at one point I was sewing through 7 layers.
The pattern was easy to follow, except at 2 points. When sewing the collar there is no mention of basting it in place, instead the pattern states to sandwich it in between the facings and main garment then stitch straight off. For all the time it takes, I do think it’s worth basting the collar first because you can’t really see it sandwiched in there as you sew.
I also found the instructions confusing for the cuff construction - there is no mention of right or wrong sides, or the notches, and no fold line on the pattern pieces. I went ahead and completed the cuffs like I would on a bomber jacket or hoodie. The pattern suggested a lengthier technique seemingly in order to hide seam allowances (although you’d never see them anyway); at the time I was confused but re-reading now it seems to make more sense.
I honestly love the finished garment (maybe it’s the extra sweat that went into it)! The fit of the pattern is very modern and I can see myself making several versions of this. The fabrics look fantastic together and the bouclé sewed beautifully - I did much of the construction directly on the overlocker again. You can also see the Stretch Interfacing I used which has done a great job of maintaining the fabric’s softness in the facings and collar.
I’d be genuinely interested to hear any tips you have for sewing leather. What went wrong? Could my teflon feet be at fault? Some of the leather has split but this is really due to my heavy handling of it and inexperience with the material. (On the plus side I think it adds a certain weathered rustic charm to the look!) Leave me a comment here, on Twitter or Instagram if you have any tips for sewing leather.
Next month, I take on the fashionista’s eternal problem: a wardrobe full of clothes yet nothing to wear! It’s a sort of 'fast-fashion' project… and there may even be a little glitter involved. Well, it is nearly Christmas after all.
Until next time, happy sewing!
Duncan
xx
#minervamakes #minervamakers #isew #memade #memades #sewing #sewist #sewists #sewinginspo #sewinginspiration #sew #sewcialist #sewingproject #sewingprojects #sewingideas #sewingprojectideas #sewingpatterninspo #lovesewing #ilovesewing #sewsewsew #sewersgonnasew #makersgonnamake #sewaholic #sewaholics #shareyoursewing #sewinglove #handmadewardrobe #handemadeclothes #isewmyclothes #memadefashion #diyclothes #diyfashion #diywardrobe #dressmaking #fabricinspo #fashionsewing #seamstress #memadeeveryday #imakemyclothes #imakemyownclothes #fashion #fashioninspo #memadewardrobe #sewingjackets #sewingblazers #sewingformen #sewingmenswear #menwhosew #sewingcardigans #newcastlecardigan #threadtheorynewcastlecardigan #threadtheory #threadtheorypatterns #indiepatterns #indiesewingpatterns
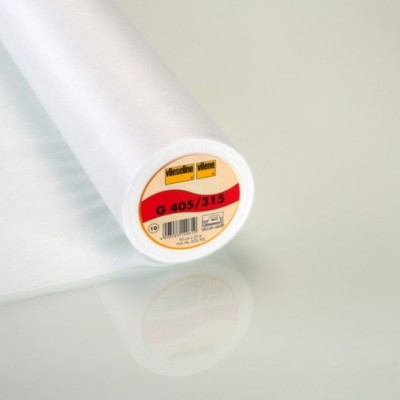
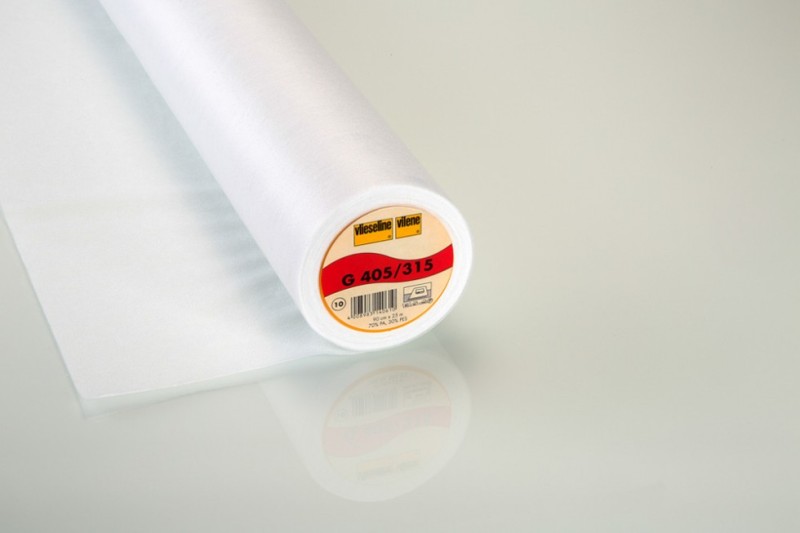
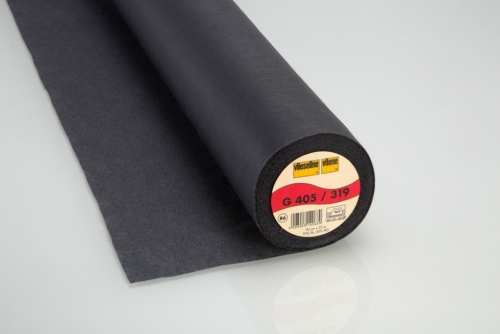
This soft versatile interfacing can be used on whole jacket fronts and small parts such as collars and pocket flaps. It has good shape-retaining qualities and is available in colours black and white. It is 90cm wide and available by the metre or by the roll.
This interfacing is suitable for light to medium weight fabrics such as wool, poplin, flannel, gabardine, satin and silk.
To apply, use the damp cloth method with an iron setting of wool/cotton. Press each area for 10-12 seconds.
Vilene H410 (tagged below)
This Iron On Light Easy Fuse Ultrasoft Interfacing is a soft interfacing with stabilising vertical threads, designed to give a traditional tailored effect. Suitable for whole jacket fronts, plus smaller parts such as collars, lapels, pocket flaps and slits. Retains perfect shape and is comfortable to wear. Available in colours black and white. It is 90cm wide and available by the metre or by the roll.
This interfacing is suitable for many fabrics from light to heavy weight, such as wool, gabardine, tweed, worsted, silk, satin or double jersey.
It is important to know with this interfacing when cutting out, the threads along the grain must follow the grain of the fabric. Use the damp cloth method, with your iron on a wool/cotton setting. Press each area for 10-12 seconds. Washable at 40 degrees and dry cleanable.
Here's a step by step guide on how it works (shown on a blazer front piece);
1) Cut out the blazer front part and the interlining. Lay the adhesive side of the interlining on the wrong side of the blazer front part.
2) Using a damp cloth, iron the interlining onto the front part step by step.
3) Attach the fused front part to the blazer.
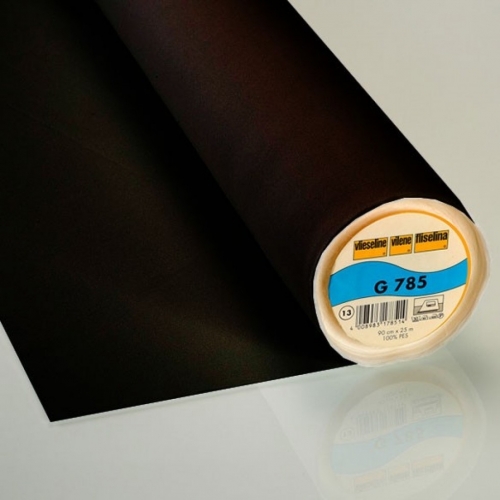
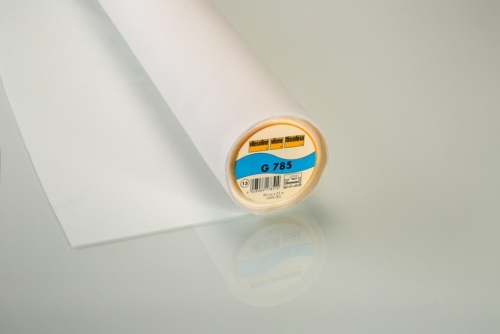
Vilene G785 (tagged below)
This iron on interfacing is a soft, lightweight and bi-elastic woven interlining for small parts of blouses and dresses as well as for front parts of jackets, coats etc. made of lightweight and/or elastic outer fabrics. It is available in colours black, white and skin. It is 90cm wide and available by the metre or by the roll.
It is suitable for delicate, flowing fabrics such as silk, viscose, acetate and cupro. It is also suitable for stretch and sheer (transparent) fabrics.
Here's a step by step guide on how it works;
1) Like all interfacing made by Vilene, the interfacing is always cut in a lengthwise direction, and thereby follows the grain of the fabric.
2) Using a low heat – iron setting at wool/silk – first apply quickly to prevent any warping, then slowly glide the iron or cover the entire area with a damp cloth.
3) Allow the pieces to cool flat for about 30 minutes, so that the adhesive can set properly.
Continued in our next post…